Staging of material
Most paver tasks will vary depending upon access, website conditions, project size and naturally, the weather. These scenarios can have an overall influence on your job from a timing stand point. Mindful consideration should be required to determine the time to begin the paver installation. Always attempt to minimize or prevent any traffic on the ready areas.
The foreman or task manager must always have the materials (sand/ pavers) distributed around the task site for efficient and simple setups. Paver pallets/bundles ought to be put in a way not to interfere with the paver installation. The appropriate pallet/bundle placement can make the actual job installation much easier and quicker by decreasing the general labor of handling the material.
Brick paver patterns
Pavers can be positioned in many different patterns depending on their shape. Each paver shape will usually have numerous different hatch patterns that are provided by the maker.
The laying pattern and shape of the paver is very vital to the performance of the application. Professionals have to take into consideration the traffic weight loads on their paver jobs. 90 or 45 degree herringbone patterns are advised in all street and driveway applications, as these patterns will provide the maximum load assistance needed and will resist sneaking from the turning of tires and beginning or braking of car traffic. In a lot of applications worldwide, it has been revealed that pavers laid in a herringbone pattern have actually performed properly.
Pavers that are 60 mm (2 - 3/8 in) density are suitable for pedestrian applications. Pavers that are going to be used in industrial or commercial applications must be 80 mm (3 - 1/8 in) in density.
Reference/starting point for brick paver installation
There are a variety of conditions that determine the starting point of a paver job.
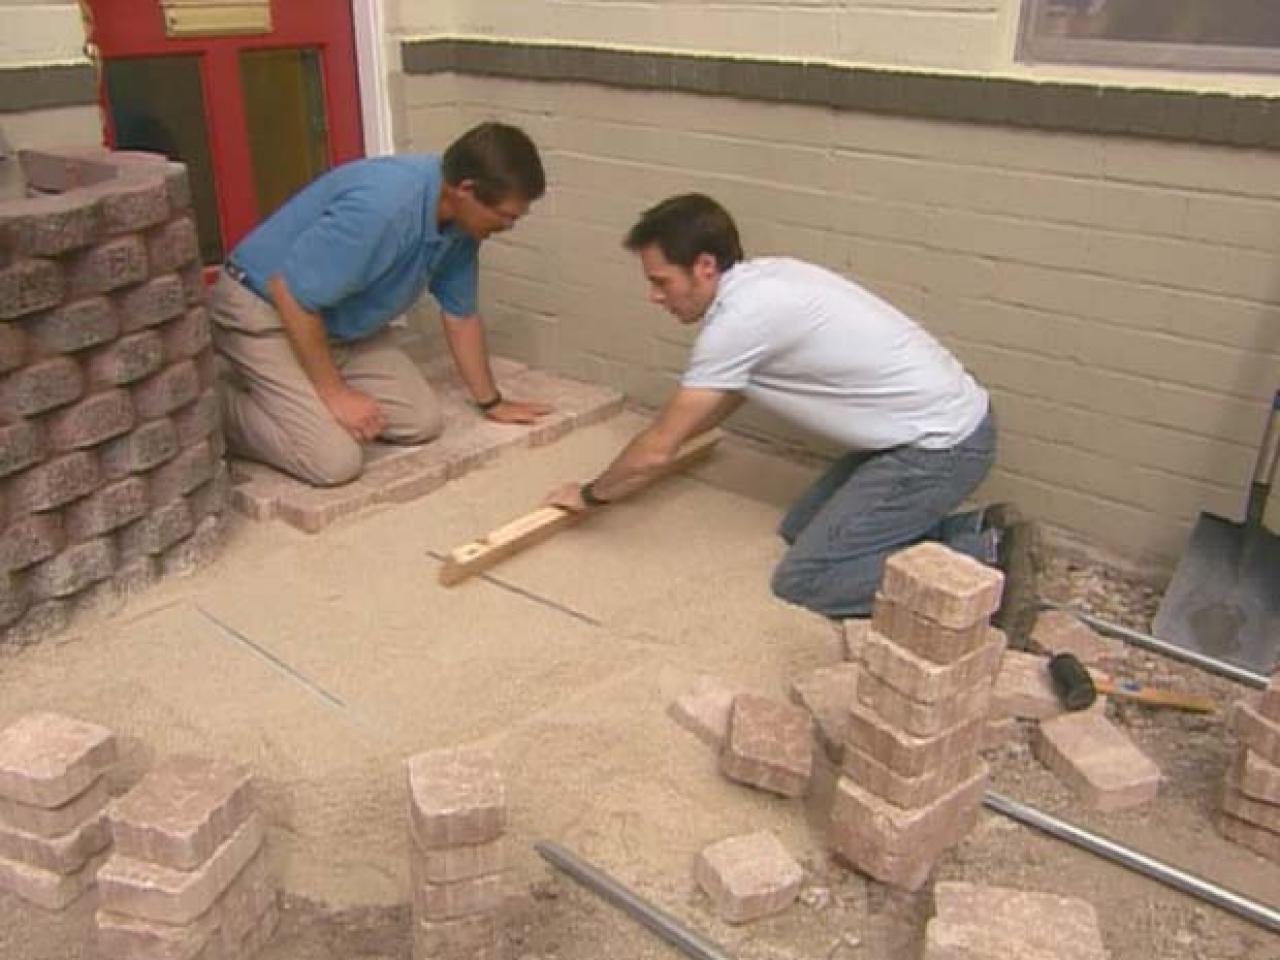
When beginning to set up pavers it is best to snap a true straight chalk line on the surface of the bedding sand or pull a true straight string line above the surface area of the bed linen sand at the finished elevation of the pavers This will help as a guide for preserving straight joint lines and will likewise permit the installer to make changes in the alignment of the pavers.
Buildings and concrete curbing are generally not straight and ought to not be utilized for developing straight joint lines. The usage of string lines is essential to determine the true straightness of the edge. As the paver installation progresses, the string lines will help lessen the requirement for little trim pieces.
Joint width in between pavers should be between 1/16 and 3/16 in (2 and 5 mm ). There are some pavers with spacer bars on their sides. These will preserve a minimum joint width and enable the bed linen and jointing sand to go into in between each paver. Pavers with spacer bars are usually not laid in snug versus each other since a string line will provide consistent joint spacing.
Installation of brick pavers.
Among the most commonly used techniques for the installation of pavers is hand installation of each paver. It is best to set up a single row of pavers along among the true straight lines that you have actually pulled or above the bed linen sand. This will provide you a straight and real line off which to work. As soon as this row is developed, you can continue to work external into the field with the remainder of the pavers. Constantly make certain to occasionally examine your joint lines to make sure they are straight and real. If not, changes to the pavers can be made as you continue setting up. Pavers needs to be set up hand tight. The very best approach is to position a paver versus another one and let it move down into the bed linen sand. Do not kick or tap the pavers into place as this can throw your lines out of true straightness.
When installing pavers on a high grade, they need to be set up at the base of the grade going uphill. This will avoid the pavers from sneaking as they are being laid.
On big industrial and commercial applications, hand laying pavers would not be cost effective due to the labor strength. The best way for installing pavers on large projects is to install them mechanically. The use of a mechanical laying maker can set up around 6000 - 7000 sq ft a day. There are a couple items a contractor should consider before setting up pavers mechanically:
1.) Mechanical installers are only capable of setting up pavers in particular patterns.
2.) The professional should ensure that the manufacturer is capable of production and bundling pavers in the preferred pattern on the pallets for easy mechanical installation.
Poor color blending might result in an irregular looking installation. A lot of manufacturers are consistent with color mixing on each package of pavers, but it is the specialist's duty to guarantee proper blending in the field.
Cutting treatments for brick pavers.
Specialists usually have two methods of cutting pavers. When cutting pavers wet, it will help lessen dust and will extend the diamond blades life. The operator of the brick saw should constantly cut the pavers away from the surface of the paver field when cutting damp, due to the truth that the pavers will create a slurry that will stain the paver surface.
The brick saw operator must constantly wear the correct security that is required for operating a saw, such as eye, ear, respiratory and hand defense ).
Edging types
Edge restraints play a significant function in the overall success of an interlocking pavement installation Edging restraints eliminate lateral motion of the pavers and hold the pavers firmly together. Particularly at the external boundary of the paver application, without an edging restraint, your task is guaranteed to stop working over time.
There are several different edging restraints from which specialists can choose. Generally made edge restraints are the most commonly utilized by specialists. Manufactured edging restraints can vary from, plastic edging, steel and aluminum, timbers or precast concrete and stone. An edging type that is used mostly in commercial and commercial applications is poured-in-place concrete curbs. This edging restraint is usually set up by other professionals.
Edging installation.
When installing your edge restraint, it should rest straight on top of the compacted gravel base. The compacted gravel base course need to extend a minimum of 6in beyond the border of the pavers This will offer a proper structure upon which the edging restraint can sit. Manufactured edging (i.E. Plastic, steel or aluminum) need to be strongly anchored into the compacted gravel base( check with the producer's literature for the recommended spacing of the spikes). There are some edging restraints that will extend deeper into the gravel base or beyond the base course (i.E. Timbers or poured-in-place curbs ). South Florida Pavers Edging restraints must never ever be positioned straight on top of the bedding sand. This could lead to the migration of the bed linen sand and ultimate lateral movement of the pavers. If there is a possibility of losing bed linen sand in between the pavers and the edge restraint, then geo textile fabric is suggested. When a gap in between the pavers and the edging goes beyond 3/8" (10mm), then the space should be filled with cut pavers. All edging applications need to be appropriately back filled after they are installed to help supply extra stability.
Compaction of brick pavers.
After installation, the pavers need to be compacted. The whole area that is to be compacted ought to be swept tidy of any foreign objects and debris that can trigger scratching or scuffing on the surface of the pavers.
In addition, it is crucial that the first compaction takes place before any jointing sand has actually been applied to the pavers. If jointing sand is used to the pavers before compaction takes location, this can trigger a bridging problem and will not permit the joints to be entirely filled with jointing sand. This can likewise prevent the pavers from being appropriately set into the bedding sand.
When condensing the pavers, it is advised that you make at least 2 passes in different directions throughout the pavers. This will allow the pavers to be correctly embeded in the bed linen sand and will require the bedding sand up into the joints from the bottom of the pavers.
The compaction of the pavers is very important to the last performance of the pavers. Failure to do appropriate compaction can result in deformations and pavement failure gradually.
Paver pallets/bundles need to be positioned in a manner not to interfere with the paver installation. One of the most widely used techniques for the installation of pavers is hand installation of each paver. The operator of the brick saw must constantly cut the pavers away from the surface area of the paver field when cutting damp, due to the truth that the pavers will develop a slurry that will stain the paver surface. Edging restraints get rid of lateral movement of the pavers and hold the pavers securely together. When a gap between the pavers and the edging surpasses 3/8" (10mm), then the space needs to be filled with cut pavers.